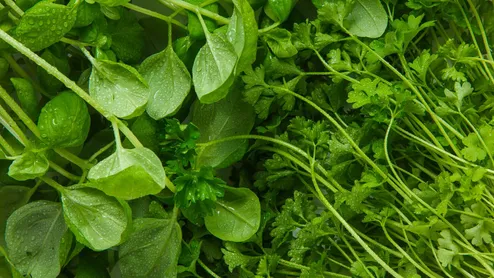
Microgreens are young seedling shoots harvested just as their first set of true leaves begins to emerge, typically when they reach 2 to 3 inches in height. Despite their tiny stature, these delicate greens deliver concentrated flavour profiles and remarkable nutritional density. With some easy steps you can grow microgreens in your kitchen.
Why You Should Grow Microgreens at Home
Nutritional Powerhouse: Packed with high concentrations of antioxidants, vitamins (A, C, E, K), and essential minerals that help support cardiovascular health and reduce inflammation.
Rapid Turnaround: Transition from sowing to harvest in as little as 10 to 14 days.
Space-Efficient: Perfect for small apartments, requiring only a bright windowsill or balcony spot.
Flavour-Packed: Delivers concentrated tastes ranging from peppery radish to sweet beetroot and rich, nutty sunflower.
Essential Supplies Checklist For Growing Microgreens
Starting your home microgreen garden requires minimal equipment:
Microgreen Seeds: Always choose non-treated seeds specifically designated for microgreens rather than regular garden seeds.
Potting Soil or Growing Medium: High-quality potting soil or coconut coir. Ensure the medium is chemical-free and free of synthetic pesticides.
Containers/Trays: Seed trays or shallow planting pots approximately 3 to 5 inches deep.
Natural Light: A sunny windowsill or balcony receiving 3 to 4 hours of daily sunlight.
Water Spray Bottle: A hand mister to gently hydrate seeds without disturbing roots or washing away soil.
Step-by-Step Microgreens Growing Process
Here is a quick step-by-step guide to grow microgreens in your kitchen and eat nutrient packed meals easily at home.
Step 1: Prepare the Container
Fill your tray or pot with roughly 3 to 4 inches of potting soil. Smooth out the surface gently without compacting the soil too tightly.
Step 2: Sow the Seeds
Evenly scatter your chosen microgreen seeds across the top of the soil. While even distribution is recommended, microgreens can be sown much more densely than standard garden crops. Cover seeds with a very light layer of soil and gently pat down.
Step 3: Moisture & Initial Germination
Misty spray clean tap water over the soil surface until evenly moist, taking care not to waterlog the tray. Keep the tray at room temperature in a dark or shaded space for roughly 2 days until seeds begin sprouting.
Step 4: Sun Light Exposure & Maintenance
Once sprouts appear, relocate your tray to a sunny windowsill receiving 3 to 4 hours of light per day. Gently mist the green shoots with water twice daily to keep the soil consistently damp.
Step 5: Harvest
When the plants reach 2 to 3 inches tall with small leaves unfolded, use clean, sharp scissors to snip the shoots just above the soil line. Wash under cold running water before serving.
Practical Tips for Storage and Serving Microgreen
Harvest on Demand: For maximum nutritional benefits, harvest only what you plan to eat immediately.
Storage Method: Wash and thoroughly dry unused greens, wrap them loosely in paper towels, and place them in an airtight container inside the refrigerator.
Culinary Uses: Add raw microgreens into fresh salads, avocado toast, sandwiches, tacos, or blend them directly into morning green smoothies.
Microgreens Make A Tiny Kitchen Garden
Growing microgreens proves that you don't need a backyard, a green thumb, or weeks of waiting to eat fresher and healthier. With just a tray, some soil, and a sunny windowsill, you can go from seed to nutrient-dense superfood in under two weeks. Once you harvest your first batch, you'll never look at store-bought greens the same way again.
(Image Credits: Magnific)
Stay tuned to read more such stories on HerZindagi.